Pages

Tuesday, June 23, 2015

2 and 4 yrs: Sandpaper Numbers, Counting and Teens/Tens board

The materials shown here are placed in areas where the children can reach and work on them when they want. They usually work on these during our morning work period, but they have been known to work on nights and weekends, too.
 
My son has been exploring the teens board (when he feels necessary) for about 1 year. He has enjoyed doing this so much he has memorized these addition problems, and now knows how to figure them out by working on paper alone.
His work at 3 yrs old using teens board and beads.
At 3  yrs, he learned the value of coins. Shortly before turning 4 we began working with  money in place of beads:
 
We don't do much with the teens anymore, and I haven't purchased the tens board (so pricey). Instead, we use this board with the bottom 10 spot. We play a game called "beat the builder." I build a number (20, 30, 40, 50, 60, 70, 80 or 90). Let's say I made the number 20, then I choose a single number (1-9). We'll say number 5. I place 5 below 20. He writes the problem down on paper (20 + 5 = ) and attempts to solve the problem before I "build" it by adding the 5 to the board ( he always wins ;) This is followed by him cheering, usually a high five and calling out the next two numbers to add together.
 
Last week he said, "Let's add 90 and 9 ... let's make 99." I giggled to myself as he already solved it before we got the numbers out to play the game.
 
My daughter has shown a huge interest in numbers and counting since 18 months. At that time she was counting to 11 (skipping number 7). One morning she woke up counting in her bed, and continued counting anything she could find until well into the afternoon.
 
 
I'm no Montessori expert, but I do know that's a sign of a sensitive period. I was thankful to have been able to provide her with the materials she needed during this time.
 
She loves the sand tray and is writing the numbers 0 and 1. 
 
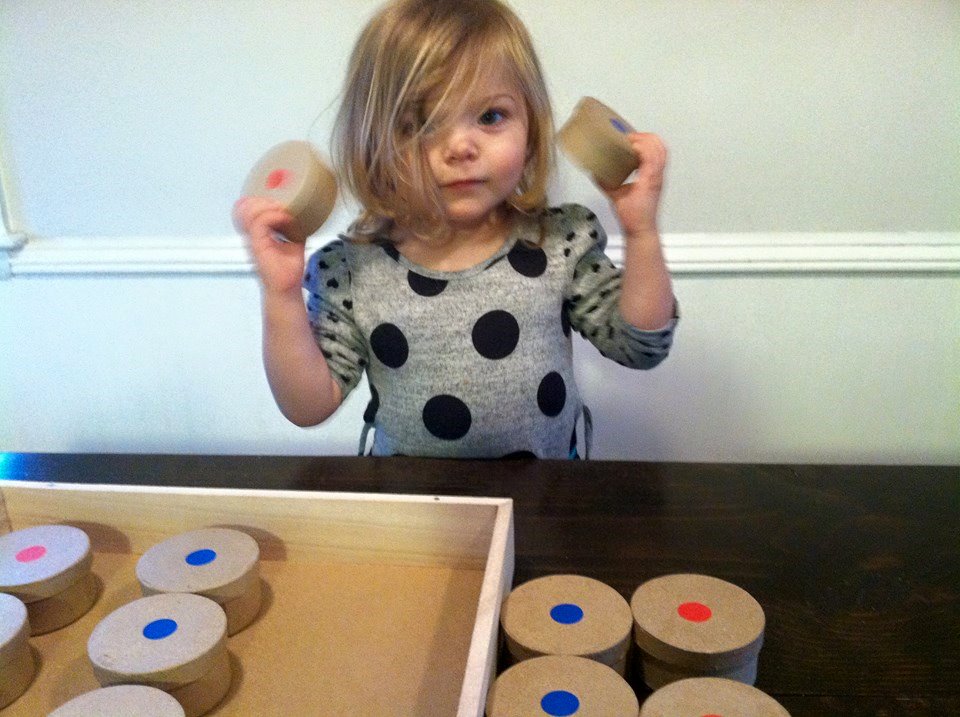
The spindle box is something we enjoy doing together now that she is able to recognize numbers 0-9. It teaches her how to count one object at a time, allows her to see the written number and see a visual of that amount at the same time.

 
Every time she completes this work, she stands up and gives me a great big hug.
 
I'm not Montessori trained, not an expert and not a purist. Just a Mom following my children's interests at home until it's time to part for Kindergarten. And I hope that day takes its time getting here ...

Friday, June 19, 2015

Montessori Inspired Clothing Match Basket

My daughter has been showing an interest in clothing lately. She has always enjoyed object to picture matching, so I decided to create this sweet little basket to play off her interest.
 
 
Here's how I made it:
  1. I gathered a variety of small doll clothes that we had at home
  2. Took separate pictures of the clothes
  3. Uploaded the pictures and placed a label under each
  4. Printed on regular cardstock paper and laminated
 
She was so excited to work with this. One of the things I love most about playing off of my children's interests, is the excitement on their face when you present something you worked hard on creating for them.
 
We've used 3-part lessons on any of the clothing items she's unsure about.
 
However, it's been beautiful to simply listen and observe her learning through play.

Thursday, June 11, 2015

Sandpaper Letters and Moveable Alphabet: How we Started Montessori at Home

My son began showing an interest in letters at age 2. Not knowing what I was doing, I began by teaching him the names of the upper case letters through play (here's an example of an old post). He learned quickly and wanted more ... and I realized I had no idea what to do next. I began searching online for fun ideas to play off of his interest and that's when I discovered Montessori.
 
Once I learned about the Montessori process for teaching letters, I didn't care if my son forgot every uppercase letter I had just taught him ...
 
(My son, age 3 after building his first words on his own with the moveable alphabet)
 
I started by purchasing sandpaper letters:
In Montessori education, letters are introduced by phonetic sounds rather than letter names. They’re also introduced in an order that allows the child to make many words with the letters they've learned. Here's the order we followed:
 
s  m  t  a  p  f  c
r  b  l  i  g  n  d
h  j  k  w  o  u  v
y  z  x  q  e
 
We would trace the sandpaper letters, then write the letters in a sand tray with our fingers. As soon as my son learned the first row of letters, he began reading Bob Books as they seemed to follow the order listed above.

After learning all the phonetic sounds with the lowercase letters, our next step was to purchase the moveable alphabet. We've been working with this material for almost 1 year ... and here we are now: 
(recently turned 4)
 
This weekend, my son helped plant our vegetable garden and wanted to write about it in his journal.
 I wrote the first sentence in his journal, "Last weekend, I went shopping for vegetable plants and helped Mom and Dad plant ....." My son then built "a gordin" and wrote it in his journal.
 
Here's another journal entry he was writing about a bubble show he was going to see. I helped him with bubble (the double "b", and the silent "e"). He did the rest on his own.
 
At 4 years old, spelling is not as important as his developing interest in writing :)
  
How this method has been helping my daughter:
Thankfully, I was able to begin this method with my daughter as soon as she began showing an interest in letters. She started around 17 months, and this picture was taken at 24 months:
Here she's matching the moveable alphabet to the sandpaper letters, saying the sounds as she moves from letter to letter.
 
She is moving through this differently than my son because of her age. She wasn't ready for reading Bob Books, but she was starting to show an interest in beginning sounds. Here I tried to upload a video of her at 24 months matching beginning letter sounds to pictures, but it didn't work too well:
 
 
This work is something she takes off of the shelf on a daily basis. She really enjoys playing with these letters, her animals and cards for matching. I love how this is school work, but it is also some of her daily play.
 
I'm hoping to share a little every week on our Montessori journey. Please note that we are not purists, and I'm not pretending to be an expert ... I just want to share our journey with hope to inspire others.

Tuesday, June 9, 2015

DIY Sound Jars

My daughter at 25 months loves her sound jars. Here's how we made them.
 
 
I bought Paper Mache containers and a shadow box from Michael's Crafts. I filled the containers with materials found around the home. The idea is to find items that will sound very different when you shake them, and to fill two containers of each:
 
 
When I was done filling, I hot glued the lids to the containers and marked the pairs (one with a blue and one with a red dot). On the bottom I marked the containers with matching colors to indicate pairs so the children can check their work.
 
 
After that, it's time to shake it! Wow am I glad I made these ... they get used all the time!
 
If you are inspired to make your own, please share - I'd love to see what you come up with.

DIY Smelling Jars

One of the most popular trays on our shelves is our DIY Smelling Jars. Today I'm sharing how I created them:
 
 
I purchased the jars and wooden box at Hobby Lobby. My 4 YO son came with me and picked out the materials. It was important that he was involved in choosing materials as this was going to be his work.
 
 
Inside of our jars I placed a cotton ball with different fragrance oils. We have mint, strawberry, lemon, coconut and vanilla fragrances.

 
Here are two examples I pulled out for show. The tops are marked with red and blue dots (they match a red jar to a blue jar) ...

 
and bottoms are marked with stickers so the children can check their own work. If they did their work correctly, the stickers will match.

25 months 
\
 
Yes, these jars are glass. We are working to switch a lot of our plastic to glass for many reasons. If you're not comfortable with glass, there are many alternatives. In a recent post: Tactile Bean Bag Match, my daughter might inspire you to create some smelling bags, or you could use plastic containers instead.
 
If you're inspired to create your own, please share them with me - I'd love to see them!

Thursday, June 4, 2015

DIY Tactile Bean Bag Match

Today I'm introducing a matching game I created for my 2-4 year olds.
 
 I made two sets of bean bags, and found a few items (different in touch/feel) around the home for filling.
 
 
How my bags are filled:
two bags filled with noodles
two with small pine cones
two bags with foam cubes
two bags with cotton balls
 
This can be played many different ways.
When my kids play independently, they simply feel and remove matches from the basket.

 
 When I set this up for my 2 yo and I to play together, I placed one set on the left and the other on the right.

 
As you can see in the picture above, she trying to explore these with all of her senses, including smell. We recently made smelling jars (post to come), and if we didn't have those, I would have been inspired to make her a set of bags to match by smell.

 
When she found a match, she placed them in the basket.

 
After playing with this activity for a few weeks, I found the way my daughter enjoys most:
  1. I place one set on the table, and the other across the room.
  2. We choose a bag for her to feel from the table set. We talk about how it feels.
  3. I ask her to find the match that feels just like it.  
  4. I hold the bag while she sets out to feel for the match across the room.
  5. She brings the match back to the table to see if she's correct. 
Playing this way is a huge win as she asks to play over and over again. And I love the movement involved in her play.
 
Enjoy!


Monday, June 1, 2015

DIY Montessori Folding Cloths

As a Montessori newbie, I recently discovered their folding cloths and had to have some! I couldn't bring myself to spend the money, so here's how I made my own (for free):
 
 
Materials used: 
Some red cloth napkins that my Mom no longer wanted
A painter's pen 
 
 
First, my daughter traces the line indicators with her pointer and middle finger; then she makes the fold.


The lines are used as control of error. If she does this correctly, the lines will be along the fold.
(I love how Montessori materials allow the child to work independently.)

At 26 months, she can independently work on squares ... the other folds I'm helping her with.

When she first showed interest in folding a few months ago, and before I knew about the Montessori method, I bought her some Dollar Store washcloths. She still enjoys these; in fact, she got these off her shelf in her bedroom for us to work on last night:)

(these pictures taken before her 2nd birthday)

I like how the Montessori inspired cloths help to teach her control of movement and different variations in folding. This is all helping to prep for her recent interest in helping with the laundry.

So sweet:)
 
 
I had four cloths left over that I didn't mark on. I paired them with some napkin rings for an activity that my 4 yo really enjoys:
 
 
Simply rolling napkins and using napkin rings.

 
Yet, this is just enough of a challenge for him.

 
And he really enjoys it!

 
This is teaching him practical life skills (he plans to do the napkin preparation for Thanksgiving next year.) It also develops his fine motor muscles and concentration.

What do you think?
Do you have any other ideas for these?